
Set up Pixette with ownCloud
Self-hosted ownCloud instances or ownCloud Infinite Scale (oCIS).
Get your WebDAV URL
ownCloud has built-in WebDAV support. Your WebDAV URL follows this format: https://your-owncloud.com/remote.php/dav/files/USERNAME/
Prepare your credentials
Use your ownCloud username and password. If you have two-factor authentication enabled, create an App Password in Settings → Security → App passwords.
WebDAV URL Format
https://your-owncloud.com/remote.php/dav/files/USERNAME/Replace your-owncloud.com with your server address and USERNAME with your ownCloud username (case-sensitive). The setup is nearly identical to Nextcloud, which was originally forked from ownCloud.
Tip
If you're using ownCloud Infinite Scale (oCIS), the preferred WebDAV endpoint uses the dav/spaces/ path. However, the legacy remote.php/dav/files/USERNAME/ path should still work. You can find your WebDAV URL in your personal settings in the oCIS web interface.
Set Up the Pixette App #
These steps are the same for all NAS types.
Configure Pixette
Open Pixette on your device and enter the connection details: URL, username, and password. All values are case-sensitive.
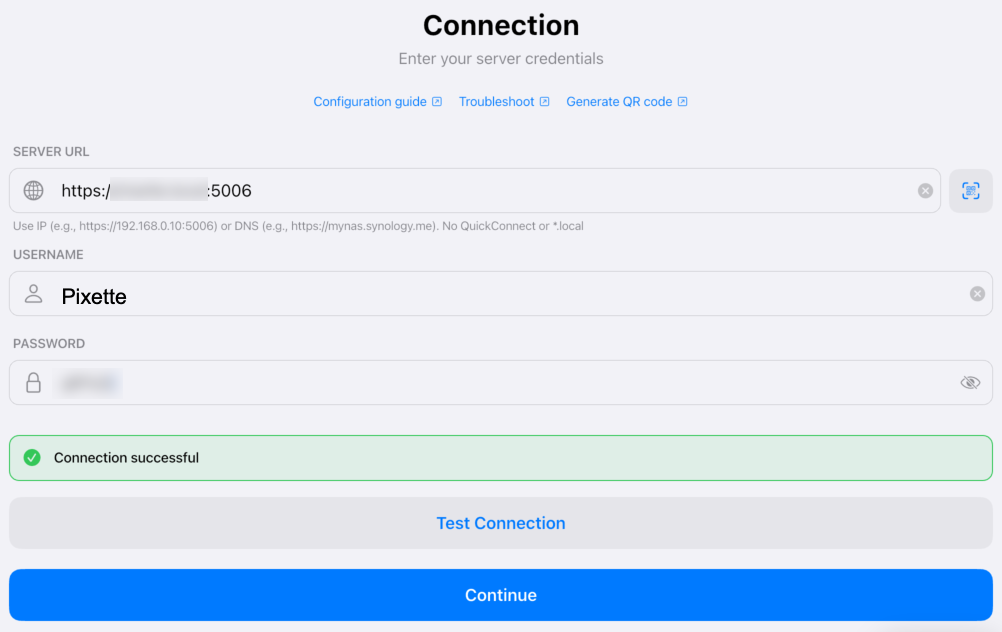
Browse and select folders
Tap 'Connect and browse folders', then select the folder containing your photos.
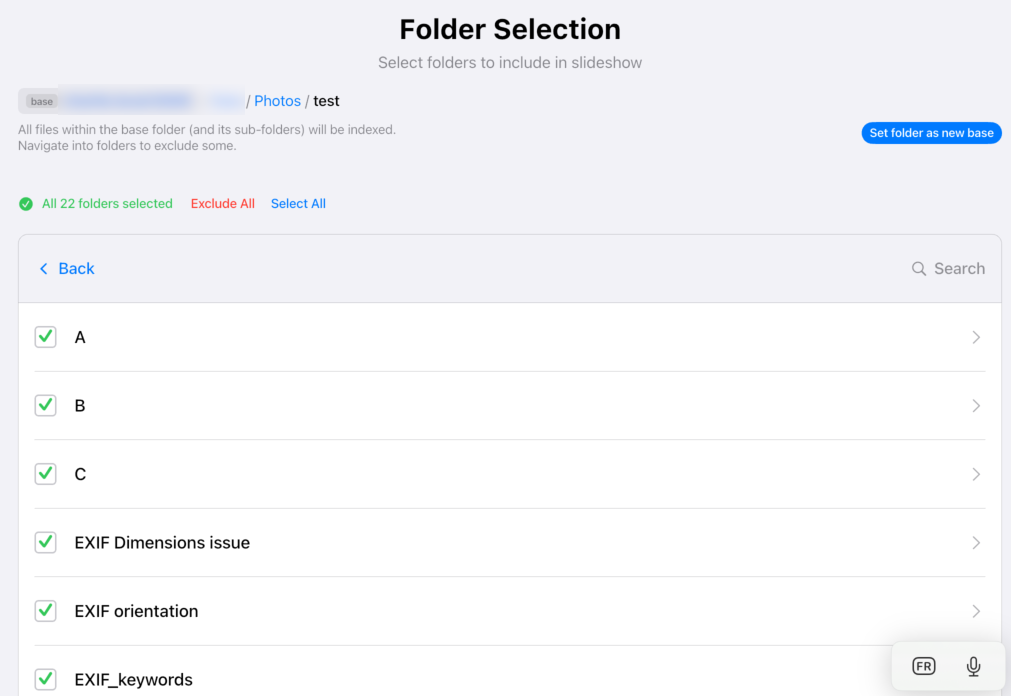
Index your files
Tap 'Index Now' to catalog all your photos and videos. This may take a few minutes depending on your collection size.
Don't have Pixette yet?
Download it free on your tablet or phone, then come back to connect your ownCloud library.
Quick Setup with QR Code
Skip manual typing. Generate a QR code with your NAS connection details and scan it with Pixette for instant configuration. Perfect for setting up multiple devices like photo frame tablets.
Secure and open source. Your credentials never leave your browser. The generator runs entirely client-side. View the source code for full transparency.
Can't see the generator? Open it directly on CodePen
Prefer manual entry? You can also generate QR codes with any standard QR library. Format the data as pipe-separated values: host|port|username|password|path
Troubleshoot WebDAV Connection #
If you're having trouble connecting Pixette to your NAS via WebDAV, try these steps. Connecting with Synology Photos instead? Make sure you're on DSM 7.0 or later, the Synology Photos package is installed, and the account you're signing in with does not have two-factor authentication (2FA) enabled.
1. Check that the URL is case-sensitive
WebDAV URLs are case-sensitive. Double-check every character, including folder names. For example: https://192.168.1.100:5006/Photos/Family
2. Test the connection from a computer first
Try connecting to your NAS via WebDAV from your computer using the exact same URL, username, and password. If your computer can't connect either, the issue is with your NAS configuration, not Pixette.
3. Use simple credentials for testing
Avoid special characters (like & £ @ #) in your password during initial setup. Use only letters and numbers until the connection works, then change to a stronger password.
4. Check if your IP is blocked
On Synology, go to Control Panel → Security → Account → Auto Block and verify that your device's IP address hasn't been blacklisted after failed login attempts.
5. Check the firewall and port
If the NAS firewall is enabled, make sure the WebDAV port (e.g. 5006) is allowed. Ensure your device is on the same local network as your NAS.
6. Check the WebDAV Server logs
On Synology, open the WebDAV Server package from Package Center to view logs. These logs often reveal the root cause of connection failures (wrong credentials, permission denied, etc.).
Still stuck? Contact me. I'm happy to help you troubleshoot.
 Synology Photos
  Immich
  QNAP
QNAP  Nextcloud
  Seafile
  TrueNAS
  Unraid